
Add a Webhook Endpoint
How to Add a Webhook Endpoint
Overview
In order to start listening to chargeback events, you will need to configure your webhook endpoints. Adding an endpoint is as simple as providing a URL that you control and selecting the event types that you want to listen to.
Adding Your First Endpoint
In your Account level view, go to the webhooks tab https://app.justt.ai/aggregated/webhooks

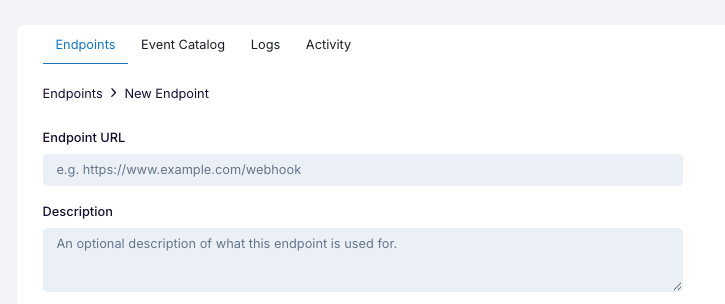
Step 1: Prepare Your Endpoint URL
Your endpoint should be:
- Publicly accessible - We need to be able to reach it from our servers
- HTTPS enabled - For security, we only support HTTPS endpoints
- POST request handler - Your endpoint should accept POST requests
- Fast responding - Should return a response within 15 seconds
Example endpoint URLs:
https://api.yourcompany.com/webhooks/chargebacks
https://yourapp.com/api/v1/chargeback-webhooks
https://webhook-handler.yoursite.com/chargebacks
after you URL is ready to receive events go ahead and click the
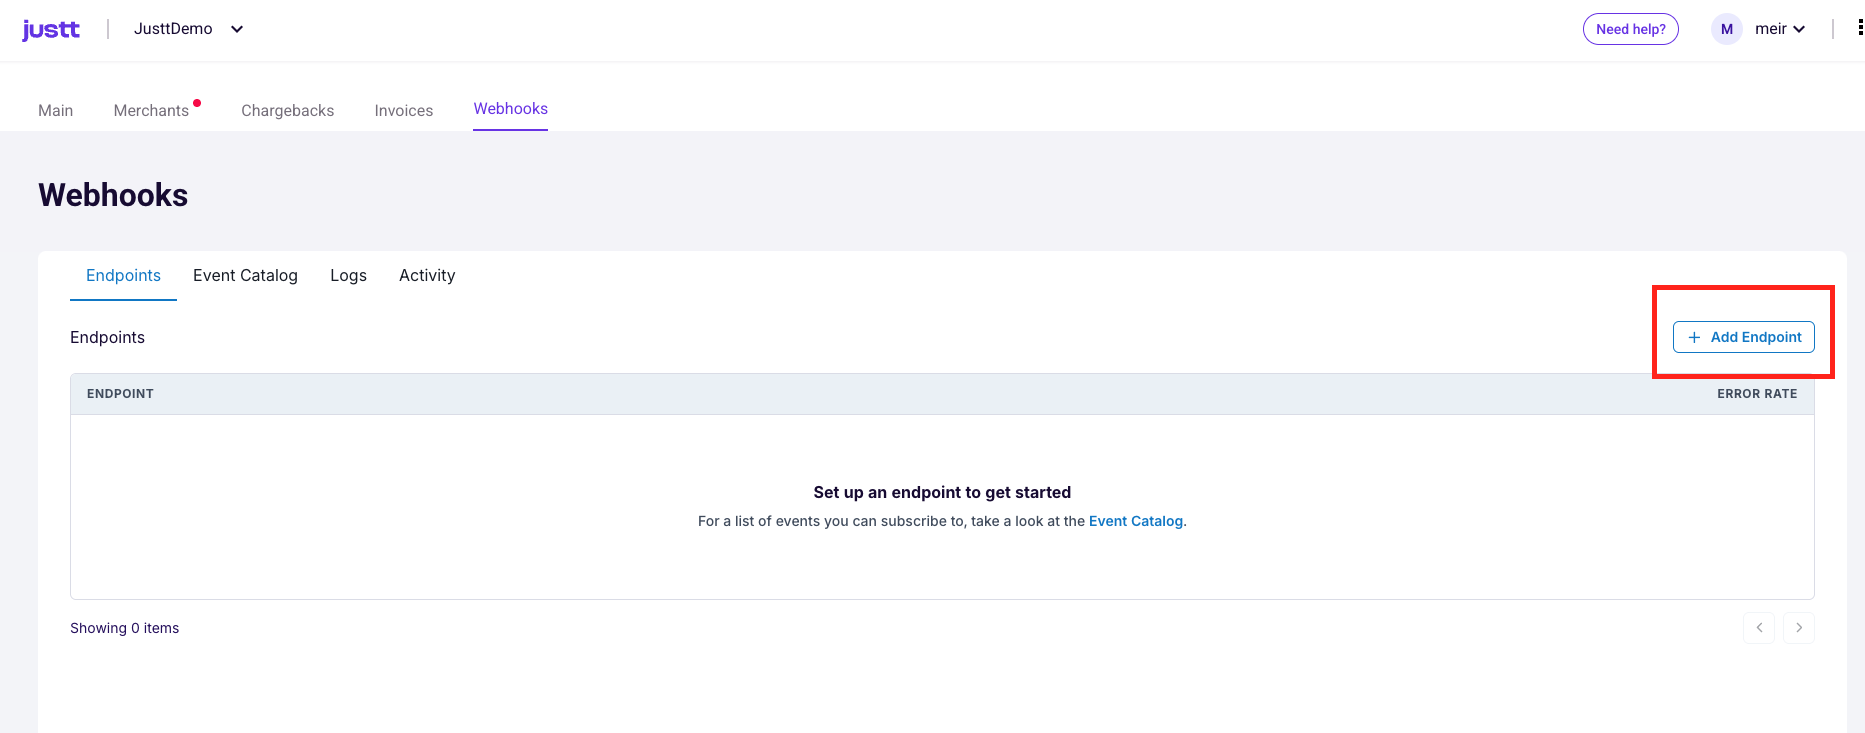
Then, add you url
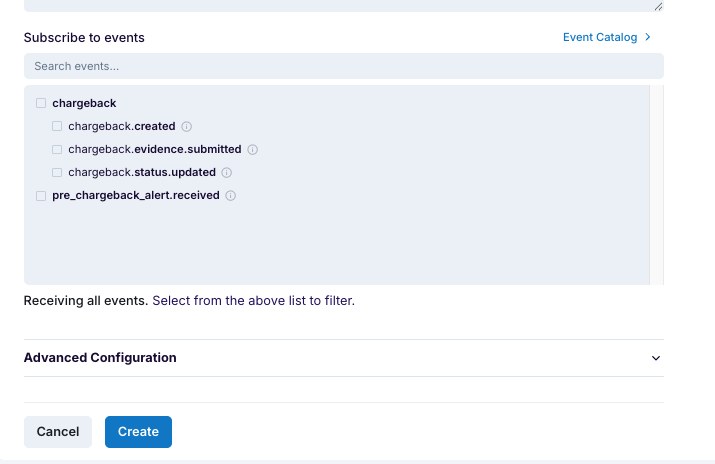
Step 2: Configure Event Types
When adding an endpoint, you can choose which events to receive:
-
All events (Recommended for testing): If you don't specify any event types, your endpoint will receive all events, regardless of type. This is helpful for getting started and testing.
-
Specific events (Recommended for production): Select only the events you need:
chargeback.created- New chargeback notificationschargeback.updated- Chargeback data updates
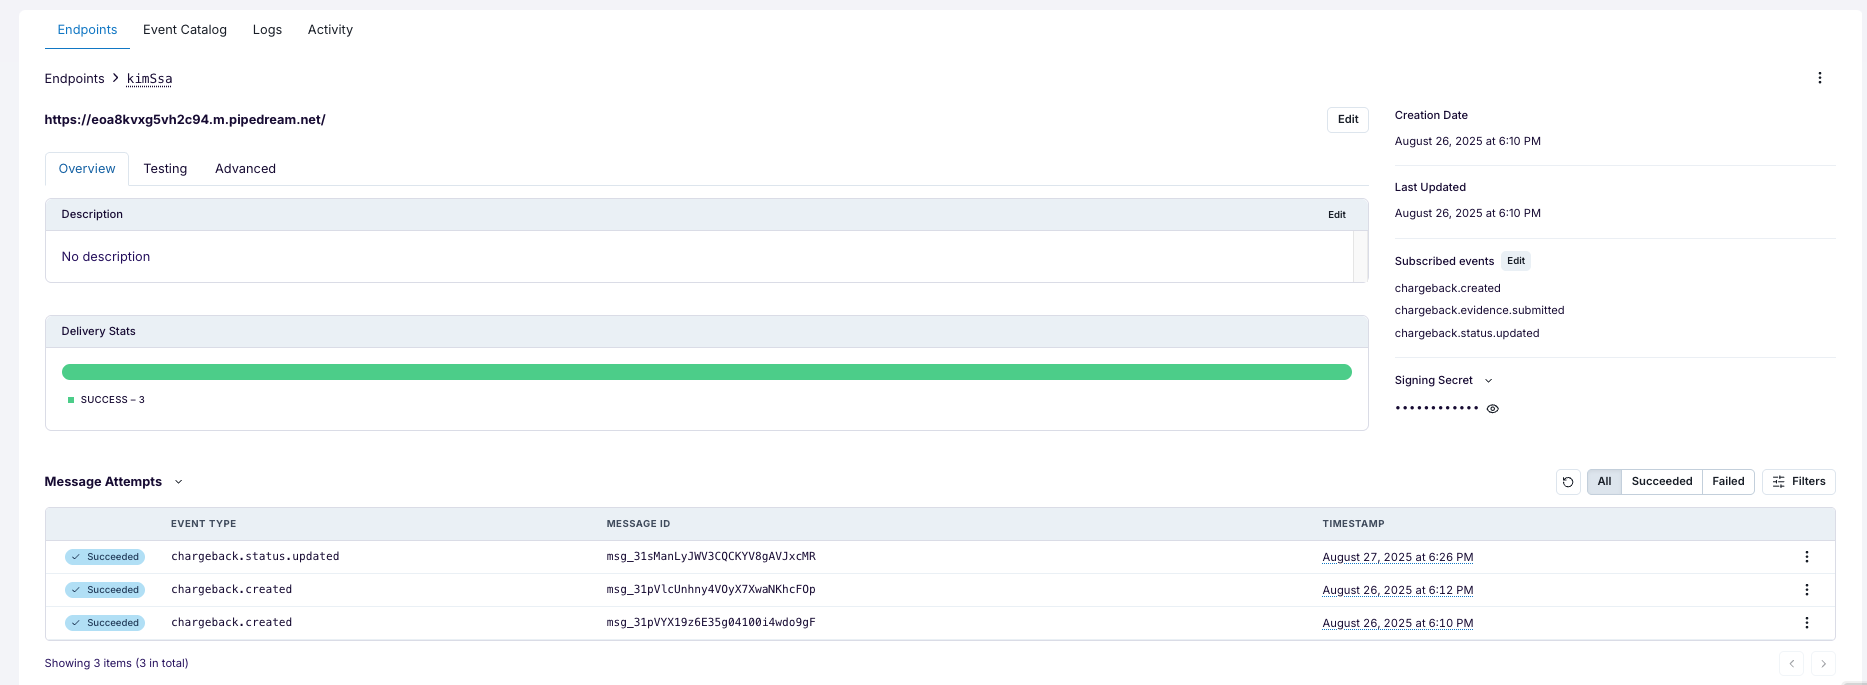
You up and ready
Best Practices
1. Idempotency
Always design your webhook handler to be idempotent. You may receive the same event multiple times due to retries, so ensure your system can handle duplicate events gracefully.
// Example: Check if event was already processed
const existingWebhook = await this.webhookLogService.findByWebhookId(event.webhookId);
if (existingWebhook) {
  return { received: true, status: 'already_processed' };
}
2. Asynchronous Processing
For complex workflows, consider processing webhooks asynchronously to respond quickly:
@Post()
@HttpCode(HttpStatus.OK)
async handleWebhook(@Body() event: WebhookEvent) {
  // Quickly validate and queue the event
  await this.webhookQueue.add('process-chargeback-event', event);

  // Respond immediately
  return { received: true, queued: true };
}
3. Logging and Monitoring
Log all webhook events for debugging and monitoring:
// Log the incoming webhook for audit trail
this.logger.log({
  message: 'Webhook received',
  event: event.event,
  webhookId: event.webhookId,
  merchantUuid: event.merchantUuid,
  timestamp: event.timestamp
});
Security Considerations
- Always verify signatures (detailed in the next section)
- Use HTTPS only for your webhook endpoints
- Disable CSRF protection for webhook routes
- Validate payload structure before processing
- Rate limit your webhook endpoints if necessary
Updated 11 months ago